How to access virtual machines in the Big Data Lab
There are several ways you can access Virtual Machines (VMs) in the Big Data Lab. VMs can be accessed through the vSphere Web Client, vSphere Desktop Client (Windows only), though Remote Desktop Connection (only for Windows VMs), or through SSH (only for Linux VMs). In order to access virtual machines from your laptop, from lab computers outside of Adams and Weed halls, or from anywhere off campus, you must first connect to the Computer Science VPN. Big Data Lab VMs are subject to the Virtual Machine Policy and the Acceptable Use Guidelines.
- Using the vSphere Web Client
- Using the vSphere Desktop Client (Windows only)
- OpenNebula portal (OpenNebula-managed VMs only)
- Remote Desktop Connection (Windows VMs only)
- SSH access (Linux VMs only), e.g., ssh user@ip-address, where ip-address is the IP address of your virtual machine
Using the vSphere Web Client
- Launch a web browser. On computers in rooms 204 or 019 Adams Hall, launch Google Chrome (under Applications->Internet, or type "google-chrome" in terminal)
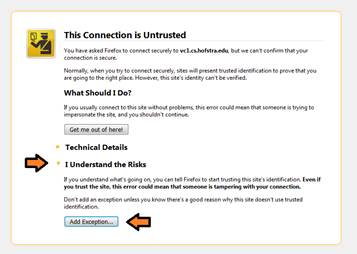
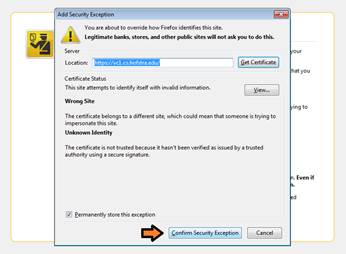
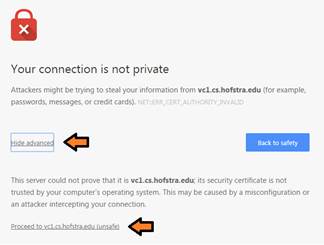
- Go to vc1.cs.hofstra.edu
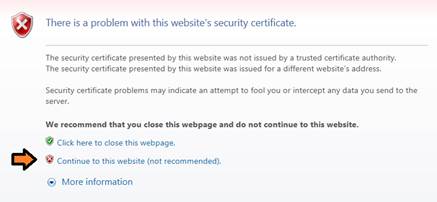
- The vCenter server uses a “self-signed” certificate, so your browser will report an error.
Mozilla Firefox: click “I Understand the Risks”, then press “Add Exception,” and then “Confirm Security Exception”
Google Chrome: click “Advanced” and then click “Proceed to vc1.cs.hofstra.edu (unsafe)”
Internet Explorer: click “Continue to the website (not recommended)”
- click “Log in to vSphere Web Client”

- If your browser reports a certificate error, repeat step 3.
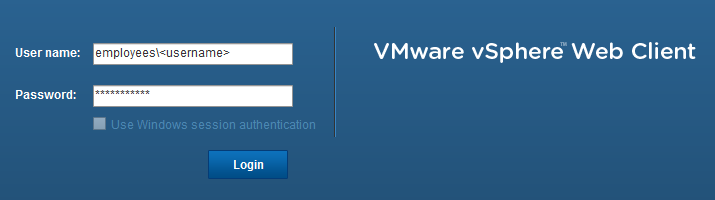
- Log in as “students\h700…” with your portal password (same as your Windows password)
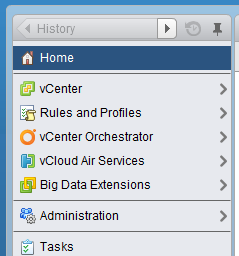
- From the left navigation sidebar, click “vCenter”, then click “VMs and Templates” to find and access your VMs.
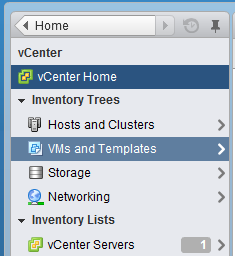
- Click on the triangles to expand the folders until you see your virtual machines.
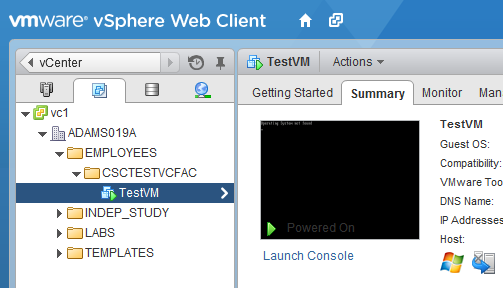
- Click “Launch Console” to access your VM.
Using the vSphere Desktop Client (Windows only)
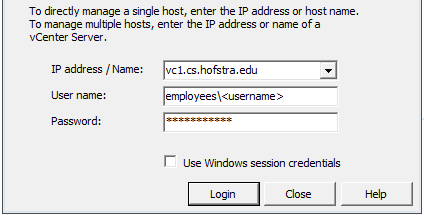
- Download and install the vSphere Client (https://vc1.cs.hofstra.edu/client/VMware-viclient.exe).
- Launch the vSphere Client and log in as "students\<username>" (replace <username> with your Hofstra username).
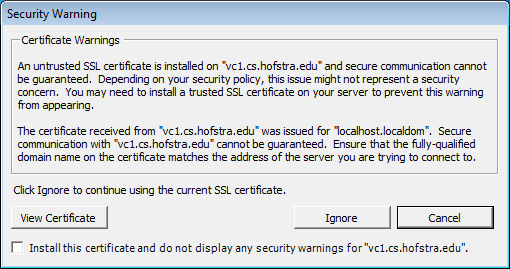
- Check the checkbox for “Install this certificate…” and click “Ignore” at the security warning prompts.
- Click “VMs and Templates”

- Click on the plus signs [+] to expand the folders until you see your virtual machines.
Then select the virtual machine you want to control and click the Launch Console button.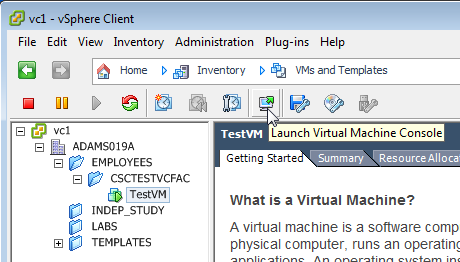
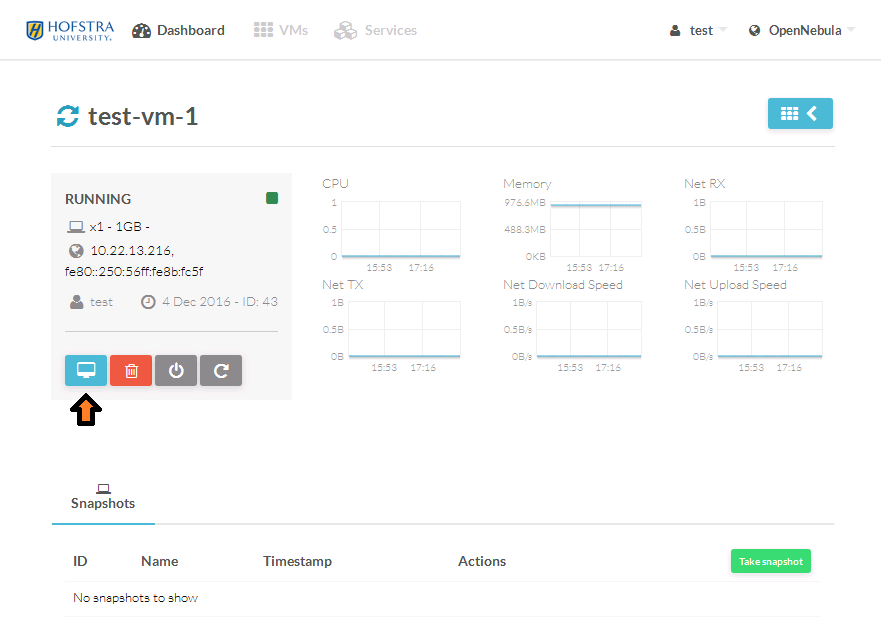
OpenNebula
- Go to one.cs.hofstra.edu.
- Login with your Portal username and password.

- Click on the VMs button.
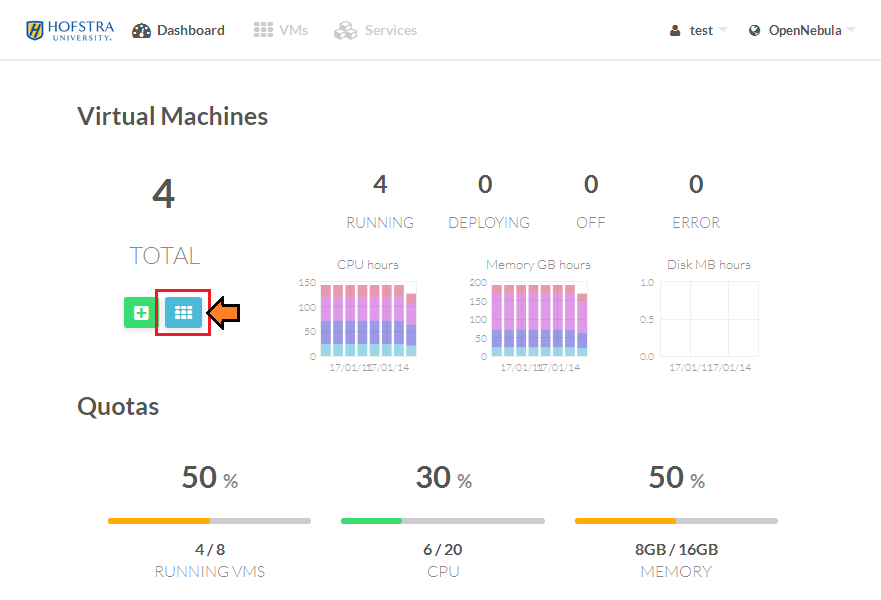
- Select the desired VM.

- Open the remote console to access the VM.
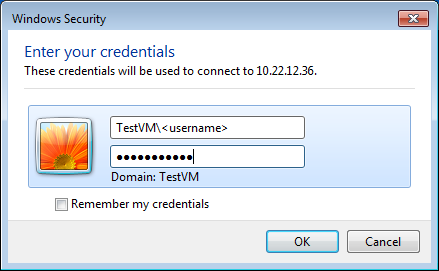
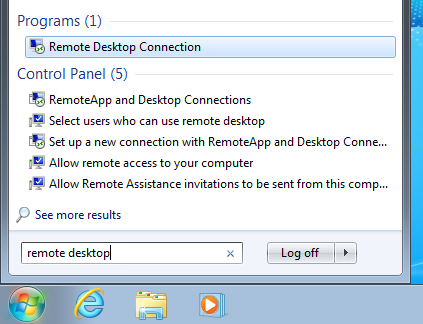
Remote Desktop Connection
- Launch “Remote Desktop Connection” from the Start menu.
- Enter the name or IP address of the virtual machine you want to connect to. The name or IP address may be observed in the vSphere Client or provided by your professor.
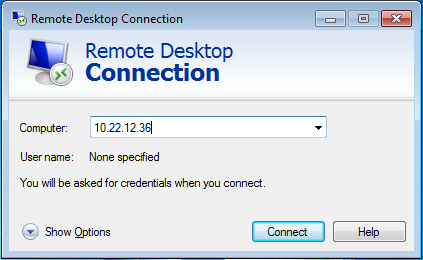
- Log into the VM as <vm-name>\<username>, where <vm-name> is the name of the virtual machine and <username> is the username of the Windows account on the virtual machine. Usually, the username is "admin" but check with your instructor if you are unsure.