Connecting an Apple iOS device to your Office 365 account
For Hofstra employees using an iPhone, iPad or iPod Touch
The images in this article were captured on an iPhone running iOS 5.1. If you're using an iPad or an iPod touch, your screen may look slightly different, but the selections and information will be the same.
If you need assistance, or have a question about this article, please call the Help Desk at 516-463-7777, or e-mail help@hofstra.edu.
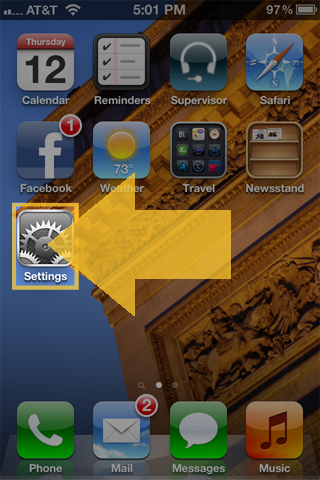
Tap the icon for the Settings app on your device's home screen.
The Settings app will open.
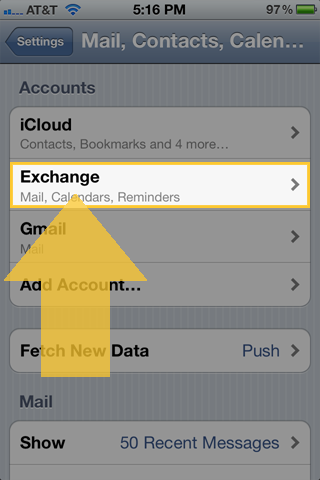
If you've previously added your Hofstra e-mail account to this device, you'll need to delete the old account before adding a new one.
If you don't have a previous account to delete, you can skip to step 5.
Under the Accounts heading, find the entry for the previous account, and tap it. Typically this account is named "Exchange" or "Hofstra," but yours might have a different name.
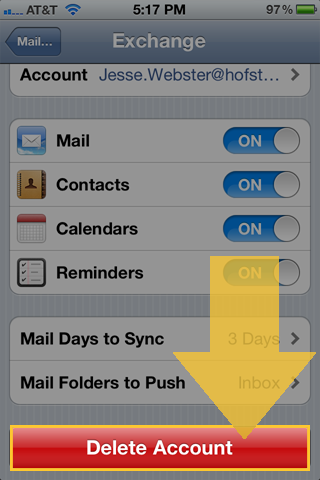
You should now see the details for your existing Hofstra e-mail account.
Scroll to the bottom of this screen, then tap the Delete Account button.
You'll be prompted to confirm you really want to delete the account. Tap Delete Account to confirm.
After the account is deleted, you'll be returned to the Mail, Contacts, Calendars screen.
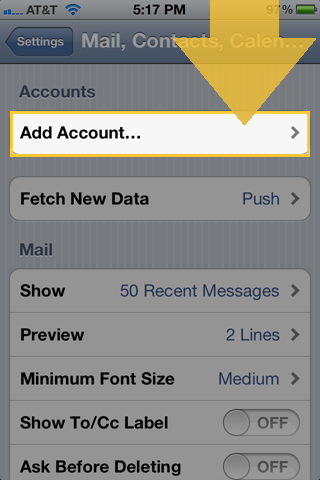
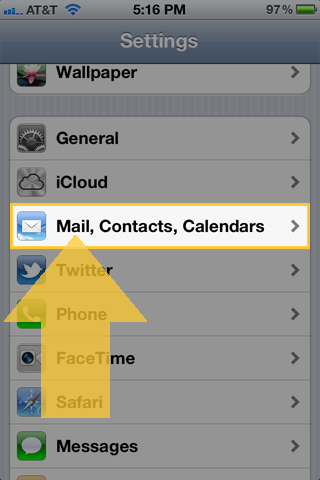
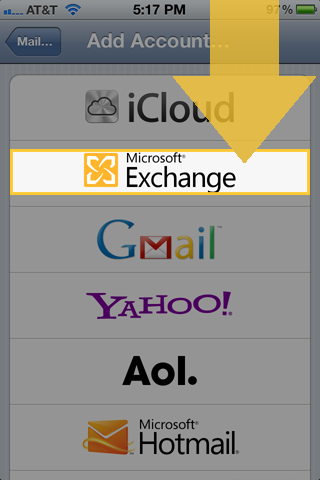
At the Mail, Contacts, Calendars screen, under the Accounts heading, find the Add Account entry, and tap it.
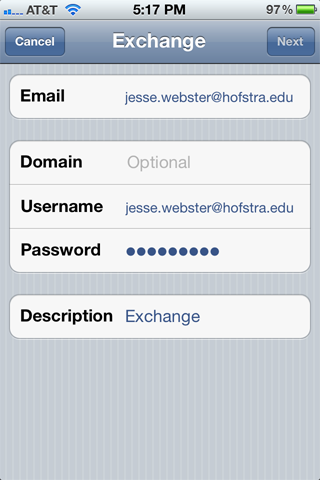
Fill in each field, as specified below:
- Email: Enter your full Hofstra.edu e-mail address
(e.g. Jesse.Webster@hofstra.edu or Jesse.A.Webster@hofstra.edu). - Domain: Leave this blank. The word "Optional" appears here by default.
- Username: Same as Email. Enter your full Hofstra.edu e-mail address.
- Password: Your Hofstra e-mail password.
- Description: Name this account. "Exchange" appears here by default.
Tap the Next button, located in the upper right-hand corner of the screen, to continue.
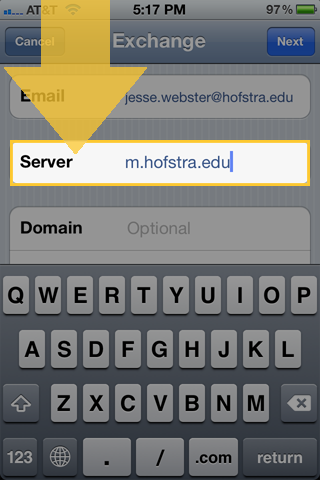
If you're prompted for a Server address, enter m.hofstra.edu and tap Next.
Otherwise, you can skip to step 9.
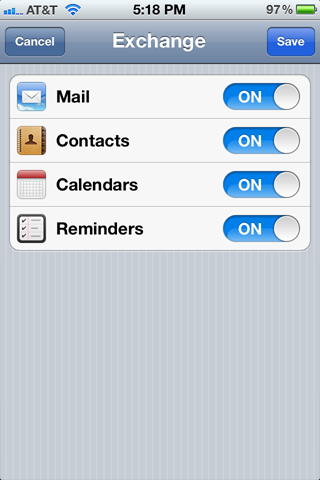
Use the toggles to select the content you'd like to sync with your device.
By default, Mail, Contacts, Calendars and Reminders (tasks) are toggled ON.
If you'd like to prevent any of these from syncing with your device, slide its toggle to the OFF position.
Once you have made your selections, tap Save to continue.
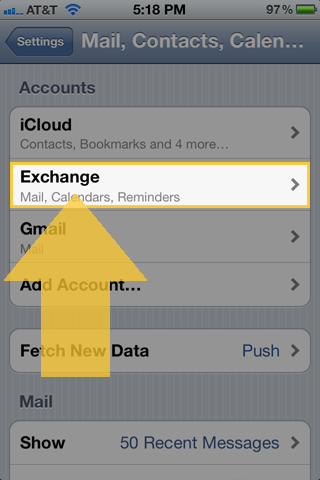
You will be returned to the Mail, Contacts, Calendars screen.
If you see your new account listed, you've added it successfully.
You can now return to the home screen and access your account using the Mail, Contacts, Calendar, or Reminders apps.
